Search the Community
Showing results for tags 'html5'.
-
Hello there, I've recently been exploring ways to create awesome animations and i've come across the 'canvas' element. Now i've been looking at some articles which explain which frameworks or libraries exist out there to assist in creating animations on canvas. But it's 2017 now - Almost 2018, what is the best framework I can use for the broader use of Canvas? I'd like to create some cool parallax backgrounds, or multilayer which move on scroll, for now anyway. As always, any help greatly appreciated
-
Hi Guys, How's it going? I can't seem to figure out how to target inside movieclip on my banner. Basically i want to play the background once my timelime reaches the button - also how I'm i suppose to make the slideshow in code-based? please find attached. http://chriswebstage.com/html5/pcf-rental-bnr-300x250-html5-v2.fla Thank alot, Chris R Archive.zip
-
 Your animation workflow is about to get a major boost. GSDevTools gives you a visual UI for interacting with and debugging GSAP animations, complete with advanced playback controls, keyboard shortcuts, global synchronization and more. Jump to specific scenes, set in/out points, play in slow motion to reveal intricate details, and even switch to a "minimal" mode on small screens. GSDevTools makes building and reviewing GSAP animations simply delightful. Get Started Load the JavaScript file //be sure to use a path that works in your dev environment <script src="./js/GSDevTools.min.js"></script> Instantiate GSDevTools GSDevTools.create(); That's it! The demo below shows GSDevTools running with its default settings. It automatically gives you control over every animation on the global timeline. Select an animation by id Any GSAP animation (tween or timeline) can be assigned an id (a string) which causes it to show up in the animation menu. That makes it easy to jump to any scene. Notice how the timeline and each tween below have an id assigned: //give the timeline and child tweens their own id. var tl = gsap.timeline({id: "timeline"}) tl.to(".orange", {duration: 1, x: 700, id: "orange"}) .to(".green", {duration: 2, x: 700, ease: "bounce", id: "green"}); //give this tween an id gsap.to(".grey", {duration: 1, x: 700, rotation: 360, delay: 3, id: "grey"}) //instantiate GSDevTools with default settings GSDevTools.create(); Now each id shows up in the animations menu (lower left). Persistence between refreshes For added convenience, when you manually set the in/out points, animation, timeScale, or looping state in the UI, they persist between refreshes! This means you can drag the in/out points to isolate a particular section and then tweak the code, hit refresh, and see the changes immediately within that cropped area. Any values set in the GSDevTools.create({...}) method will override manual selections. Set persist: false to disable persistence. If you encounter persistence contamination (e.g. setting timeScale in one affects another), simply assign a unique id to the GSDevTools instance (the recorded values are segregated by id, session, and domain). Configuration options GSDevTools can be configured extensively. Optionally define any of these properties in the config object: animation [string | animation] - If you define an animation, like animation: myTimeline, animation: myTween or animation: "id", that animation will be initially selected. By default, the global timeline is selected. container [string | element] - Specify the container element for GSDevTools, like: "#devTools" or document.getElementById ("devTools"). css [object | string] - The CSS you want on the outer div, like {width:"50%", bottom:"30px"} or a string of css like "width: 50%; bottom: 30px". It is safe to use GSAP-specific shortcuts like x, yPercent, etc. in the object syntax because it just gets passed to a gsap.set() internally. globalSync [boolean] - By default, animations are kept in context and synchronized with the root timeline (scrubbing one scrubs them all), but you can set globalSync: false to unhook it from the global timeline. Note: only one GSDevTools instance can be globally synchronized on a page (otherwise scrubbing them both to different times would break the time-space continuum). hideGlobalTimeline [boolean] - If true, the Global Timeline will be removed from the animation menu. id [string] - A unique string to identify the GSDevTools instance. The persistent values between refreshes are mapped to this id, so if you ever run into a case where there's cross-contamination of the persistent values (like if you embed multiple codepens on one page and don't want timeScale changes in one to affect the others on refresh), just make sure you give each one a unique id. inTime [number | string] - Position of the in marker (time, in seconds, or label or animation id). You can even use relative values like "myAnimation-=2" to start 2 seconds before the animation with the id of "myAnimation". If you use just a negative relative value like "-=5" , it will be measured from the end of the timeline, making it easy to just watch the final 5 seconds. keyboard [boolean] - If true (the default), keyboard shortcuts will work. Note: only one GSDevTools instance can listen for keyboard shortcuts. paused [boolean] - Initial paused state. loop [boolean] - Initial loop state. minimal [boolean] - If true, the UI will only show minimal controls (scrubber, play/pause, and timeScale). Note: when the screen is less than 600px it automatically switches to minimal mode anyway. outTime [time | label] - Position of the out marker (time, in seconds, or label, or animation id). You can even use relative values like "myAnimation+=2" to end 2 seconds after the animation with the id of "myAnimation" ends. If you use just a positive relative value like "+=5", it will be measured from wherever the inTime is. persist [boolean] - By default, GSDevTools remembers the in/out points, selected animation, timeScale, and looping state between refreshes in the same domain session, but you can disable that behavior by setting persist: false. timeScale [number] - Initial timeScale. visibility [string] - "auto" causes the controls to automatically hide when you roll off of them for about 1 second, and return when you move your mouse over the area again. Default is "visible", or you can set it to "hidden" to hide the controls initially (useful if you don't want the controls to obscure any part of the screen - you can still use the keyboard shortcuts to control playback or tap the "H" key to toggle visibility). Keyboard Controls SPACEBAR: Play/pause UP/DOWN ARROWS: Increase/decrease timeScale LEFT ARROW: Rewind RIGHT ARROW: Jump to end L: Toggle loop I: Set the in point to current position of playhead O: Set the out point to current position of playhead H: Hide/show toggle Tips and tricks Clicking the GreenSock logo (bottom right) gets you right to the GreenSock docs! Double-click on the in/out marker(s) to reset them both immediately. If the playback UI is obscuring part of your animation, just tap the "H" key to hide it (and again to bring it back) - you can still use all the keyboard shortcuts even when it's invisible. Advanced demos We purposefully chose very basic animations for the demos above, but here are a few that illustrate how easy GSDevTools makes it to control and debug even super-complex animation sequences. How do I get it? GSDevTools is available to Club GreenSock members ("Shockingly Green" and above). Just download GSAP with the bonus files zip from your Dashboard. Try GSDevTools for free on CodePen. To learn how to include GSDevTools into your project, see the GSAP install docs. FAQ Why is my global timeline 1000 seconds long? That means you've probably got an infinitely repeating animation somewhere. GSDevTools caps its duration at 1000 seconds. Scrubbing to Infinity is awkward. Does loading GSDevTools impact runtime performance? Since it must monitor and record the root timeline, yes, there is a slight performance hit but probably not noticeable. Keep in mind that usually you'll only load GSDevTools while you're developing/reviewing your animations and then remove it when you're ready to launch, so ultimately it shouldn't be much of a factor anyway. Why isn't GSDevTools in the CDN or GitHub repo? Because it's a membership benefit of Club GreenSock. It's a way for us to give back to those who support our ongoing development efforts. That's why we've been able to continue innovating for over a decade. See https://greensock.com/why-license for details about our philosophy. Does GSDevTools work with other animation libraries? Nope, it depends on some unique capabilities baked into the GSAP architecture. What will I do with all the time this tool saves me? Take up a new hobby, ponder deep philosophical questions, make cookies - it's up to you.
-
- 5
-

-
- javascript
- animation
- (and 8 more)
-
HI everyone, really happy to get a job animating HTML5 banners using GSAP. Making and animating the banners are not the problem, i am having a problem getting them loaded into sizmek. I followed some documentation and registered click events but the agency i have to send them to says they won't work. Does any one have a blank biolerplate i can load my project into with sizmek built into it. The static banner template from sizmek set they gave me keeps throwing errors it's just a simple one size banner that needs a to be fully clickable. Any help would be appreciated.
-
Hi everybody, my question is where can look remote jobs for banner developer role, I just looking some project, if you have any project for me or you know any company or agency, please share with me, or let me know! I appreciate any help. Regards!
-
Hi Guys, (and thx for the forum and thx in general to Greensock) I need a simple reveal/masking "trick"? I call it a trick, because i dont belive that there is a direct method for it in CSS/HTML5. I call it simple, 'cause i need it basically in it's simplest form. So: - 2 layers that are interconnected (div's or img's or whatever) - Layer 1 is invisible and controls what is shown of the 2nd layer. - Layer 1 can be animated. (Basic masking - like in the old and very much simpler Flash days ) Anyone figured this out? I see a lot of SVG masking discussed, but thats not what i need in this case. (so please dont refer me to those threads, im pretty sure i have investigated anything within reason for an explanation) Also, please no -webkit stuff. It needs to be solid across browsers. Hope that You guys can help an old time Greensock user out. Thx in advance /Simon
-
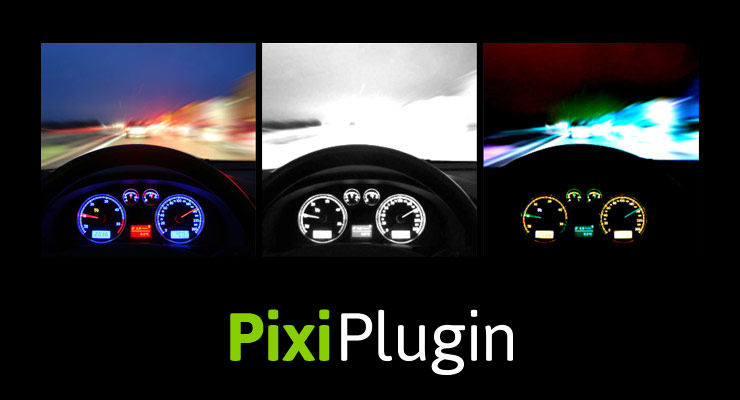 PixiJS is a canvas library that can utilize WebGL for insanely fast rendering, plus it has all sorts of crazy filters and fun effects. You could always use GSAP to animate PixiJS objects (after all, GSAP can tween any property of any JS object), but it was a tad cumbersome with certain properties because they're tucked inside sub-objects in PixiJS's API, like object.position.x, object.scale.y, object.skew.x, etc. Plus PixiJS defines rotational values in radians instead of degrees which isn't as intuitive for most developers/designers. PixiPlugin saves you the headaches: //old way (without plugin): gsap.to(pixiObject.scale, {x: 2, y: 1.5}); gsap.to(pixiObject.skew, {x: 30 * Math.PI / 180}); gsap.to(pixiObject, {rotation: 60 * Math.PI / 180}); //new way (with plugin): gsap.to(pixiObject, {pixi:{scaleX: 2, scaleY: 1.5, skewX: 30, rotation: 60}}); PixiJS requires that you define color-related values in a format like 0xFF0000 but with PixiPlugin, you can define them the same way you would in CSS, like "red" | "#F00" | "#FF0000" | "rgb(255,0,0)" | "hsl(0, 100%, 50%)" | 0xFF0000. You can even do relative HSL values! "hsl(+=180, +=0%, +=0%)". Another big convenience is that PixiPlugin recognizes some special values like saturation, brightness, contrast, hue, and colorize (which all leverage a ColorMatrixFilter under the hood). Or if you have a custom ColorMatrixFilter, just pass that in as the colorMatrixFilter property and it'll handle animating between states. Lastly, PixiPlugin recognizes blur, blurX, and blurY properties, so it's very simple to apply a blur without having to create a new BlurFilter instance, add it to the filters array, and animate its properties separately. PixiPlugin significantly improves developer ergonomics for anyone animating in PixiJS. Less code, fewer headaches, and faster production. See the docs for details. To learn how to include PixiPlugin into your project, see the GSAP install docs.
 -
Can someone assist me on change this current animation: TweenLite.fromTo(spot_holder[kNumIterator], 2, {left:pointAX, top:pointAY}, {left:pointBX, top:pointBY, immediateRender:false}); to this: TweenLite.fromTo(spot_holder[kNumIterator], { ease: Bounce.easeOut, y: -500 }); or what do I change to make the animation HAVE a bounce effect, zoom effect or any other effect
-
Hello, I was wondering if anyone had any idea how this website https://www.box.com/ did their first animation? ie, as you scroll down, the box opens up and shows images -> how do they do the box that opens up? Any help greatly appreciated
-
 Hi, I want to create a line on top of the frame i.e. the line should start from the center and grow simultaneously towards the side. Have given the sample link (this is in TimeLineLite): I want to add the above code to the following banner (have attached the files as well): The problem that I am facing is how to add this to "TimeLineMax" and the line should start/grow along with the word that eases in the screen. Thanks sample.zip
 -
I have an image: and I want to fill the missing part of it. The best way I found was to convert the missing part of the image to SVG and then start filling the missing part using tweenmax. For reference, I have added the animation for filling the svg but it is not animating like what I need i.e. it is increasing from center point. I need to blend the animation like the image missing area is filling from one end. I can change the way of animating if there is any other way we can fill the missing part of the image? I have also tried other solution of fill mode but smooth transition is not happening in it.
-
How can I make a text float in like a wave from left to right. I am able to get the text into the frame normally but not like a wave form. Is there a way of doing it?
-
Hi Guys Can you help me to develop carousel banner with adobe animate, or i have to do it html5 code, can you guys share any sample, thank you so much
-
Hi! I have a HTML5 banner advertisement that I'd like to automatically replay the animation on a loop. Is this possible? I have attached the HTML5 banner advertisement source files. Please let me know how to accomplish this. Thank you for your help! 120x600_v2.zip
-
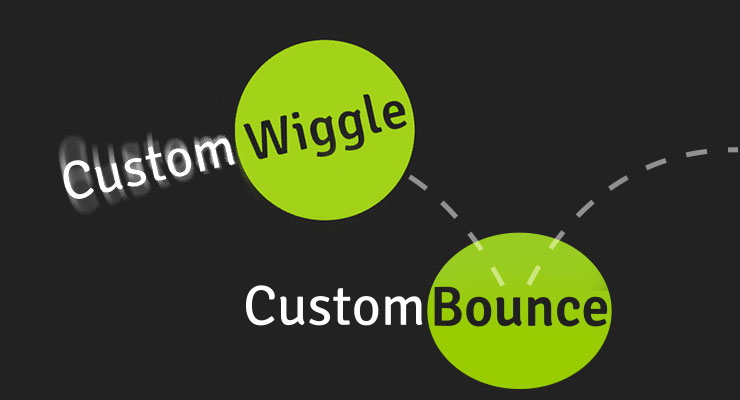
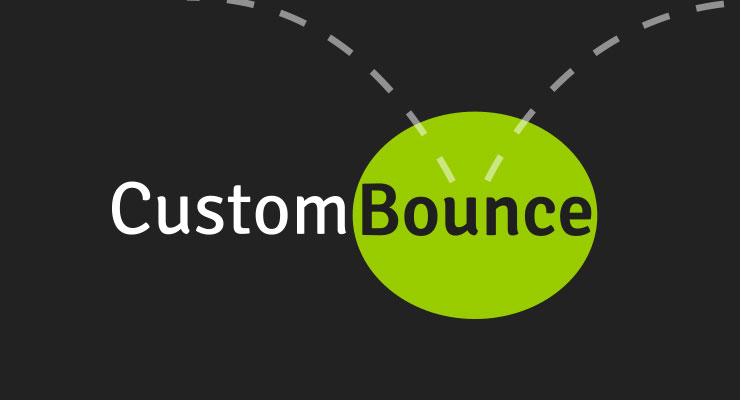 GSAP always had the tried-and-true "bounce" ease, but there was no way to customize how "bouncy" it was, nor could you get a synchronized squash and stretch effect during the bounce because: The "bounce" ease needs to stick to the ground momentarily at the point of the bounce while the squashing occurs. Bounce.easeOut offers no such customization. There was no way to create the corresponding [synchronized] scaleX/scaleY ease for the squashing/stretching. CustomEase solves this now, but it'd still be very difficult to manually draw that ease with all the points lined up in the right spots to match up with the bounces. With CustomBounce, you can set a few parameters and it'll create BOTH CustomEases for you (one for the bounce, and one [optionally] for the squash/stretch). Think of CustomBounce like a wrapper that creates a CustomEase under the hood based on the variables you pass in. Note that this video uses GSAP 2's format. Options strength (Number) - A number between 0 and 1 that determines how "bouncy" the ease is, so 0.9 will have a lot more bounces than 0.3. Default: 0.7 endAtStart (Boolean) - If true, the ease will end back where it started, allowing you to get an effect like an object sitting on the ground, leaping into the air, and bouncing back down to a stop. Default: false squash (Number) - Controls how long the squash should last (the gap between bounces, when it appears "stuck"). Typically 2 is a good number, but 4 (as an example) would make the squash longer in relation to the rest of the ease. Default: 0 squashID (String) - The ID that should be assigned to the squash ease. The default is whatever the ID of the bounce is plus "-squash" appended to the end. For example, CustomBounce.create("hop", {strength:0.6, squash:2}) would default to a squash ease ID of "hop-squash". How do you get the bounce and the squash/stretch to work together? You'd use two tweens; one for the position ("y"), and the other for the scaleX/scaleY, with both running at the same time: //Create a custom bounce ease: CustomBounce.create("myBounce", {strength:0.6, squash:3, squashID:"myBounce-squash"}); //do the bounce by affecting the "y" property. gsap.from(".class", {duration: 2, y:-200, ease:"myBounce"}); //and do the squash/stretch at the same time: gsap.to(".class", {duration: 2, scaleX:140, scaleY:60, ease:"myBounce-squash", transformOrigin:"center bottom"}); How to get CustomBounce CustomBounce is a membership benefit of Club GreenSock. Once you're a member, you can simply log in and download it from your Account Dashboard anytime, or use our private NPM repository. See the install page for details. Also note that CustomBounce requires CustomEase. Demos CustomBounce Demos
 -
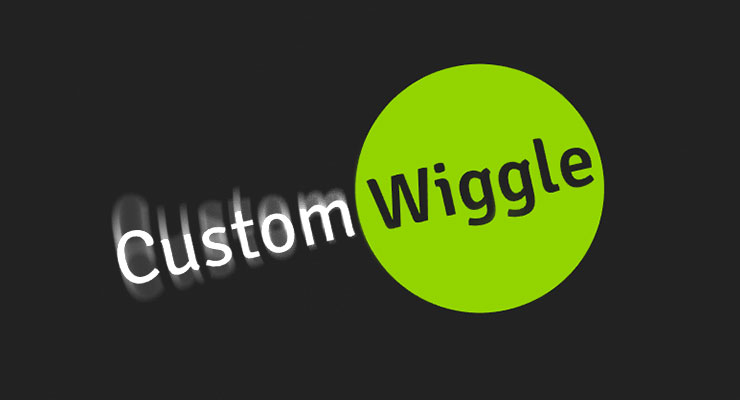 CustomWiggle extends CustomEase (think of it like a wrapper that creates a CustomEase under the hood based on the variables you pass in), allowing you to not only set the number of wiggles, but also the type of wiggle (there are 5 types; see demo below). Advanced users can even alter the plotting of the wiggle curves along either axis using amplitudeEase and timingEase special properties. Note that the video is using GSAP 2 format. Demo: CustomWiggle Types Options wiggles (Integer) - Number of oscillations back and forth. Default: 10 type (String) "easeOut" | "easeInOut" | "anticipate" | "uniform" | "random" - tThe type (or style) of wiggle (see demo above). Default: "easeOut" amplitudeEase (Ease) - Provides advanced control over the shape of the amplitude (y-axis in the ease visualizer). You define an ease that controls the amplitude's progress from 1 toward 0 over the course of the tween. Defining an amplitudeEase (or timingEase) will override the "type" (think of the 5 "types" as convenient presets for amplitudeEase and timingEase combinations). See the example codepen to play around and visualize how it works. timingEase (Ease) - Provides advanced control over how the waves are plotted over time (x-axis in the ease visualizer). Defining an timingEase (or amplitudeEase) will override the "type" (think of the 5 "types" as convenient presets for amplitudeEase and timingEase combinations). See the example CodePen to play around and visualize how it works. How do you control the strength of the wiggle (or how far it goes)? Simply by setting the tween property values themselves. For example, a wiggle to rotation:30 would be stronger than rotation:10. Remember, and ease just controls the ratio of movement toward whatever value you supply for each property in your tween. Sample code //Create a wiggle with 6 oscillations (default type:"easeOut") CustomWiggle.create("myWiggle", {wiggles:6}); //now use it in an ease. "rotation" will wiggle to 30 and back just as much in the opposite direction, ending where it began. gsap.to(".class", {duration: 2, rotation:30, ease:"myWiggle"}); //Create a 10-wiggle anticipation ease: CustomWiggle.create("funWiggle", {wiggles:10, type:"anticipate"}); gsap.to(".class", {duration: 2, rotation:30, ease:"funWiggle"}); Wiggling isn't just for "rotation"; you can use it for any property. For example, you could create a swarm effect by using just 2 randomized wiggle tweens on "x" and "y", as demonstrated here. Download CustomWiggle CustomWiggle and CustomBounce are membership benefits of Club GreenSock. It's our way of saying "thanks" to those who support GreenSock's ongoing efforts. Joining Club GreenSock gets you a bunch of other bonus plugins and tools like MorphSVGPlugin as well, so check out greensock.com/club/ for details and sign up today. Note: CustomWiggle is not in the GitHub repository or CDN; it's only available for download at GreenSock.com. Demos CustomWiggle Demos
 -
Hi! Is it possible to animate <details> tag somehow using GSAP?
-
 Note: This page was created for GSAP version 2. We have since released GSAP 3 with many improvements. While it is backward compatible with most GSAP 2 features, some parts may need to be updated to work properly. Please see the GSAP 3 release notes for details. Have you ever tried getting a realistic wiggle effect or tweaking just how bouncy an ease is? What about adding squash and stretch to a bounce? These are not easy tasks. Well, until now. Even though CustomEase, lets you create literally any easing effect that you can imagine (bounces, wiggles, elastic effects, whatever) by drawing them, it's difficult to plot a complex wiggle or bounce while making sure all the points are spaced correctly. Wouldn't it be nice if you could just set a few parameters (like number of wiggles or bounciness) and have that complex easing curve created for you? Wish granted. CustomWiggle CustomWiggle extends CustomEase (think of it like a wrapper that creates a CustomEase under the hood based on the variables you pass in), allowing you to not only set the number of wiggles, but also the type of wiggle (there are 5 types; see demo below). Advanced users can even alter the plotting of the wiggle curves along either axis using amplitudeEase and timingEase special properties (see the docs for details). Demo: CustomWiggle Types See the Pen CustomWiggle Demo : resized by GreenSock (@GreenSock) on CodePen. Options wiggles (Integer) - number of oscillations back and forth. Default: 10 type (String) "easeOut" | "easeInOut" | "anticipate" | "uniform" | "random" - the type (or style) of wiggle (see demo above). Default: "easeOut" amplitudeEase (Ease) - provides advanced control over the shape of the amplitude (y-axis in the ease visualizer). You define an ease that controls the amplitude's progress from 1 toward 0 over the course of the tween. Defining an amplitudeEase (or timingEase) will override the "type" (think of the 5 "types" as convenient presets for amplitudeEase and timingEase combinations). See the example codepen to play around and visualize how it works. timingEase (Ease) - provides advanced control over how the waves are plotted over time (x-axis in the ease visualizer). Defining an timingEase (or amplitudeEase) will override the "type" (think of the 5 "types" as convenient presets for amplitudeEase and timingEase combinations). See the example codepen to play around and visualize how it works. How do you control the strength of the wiggle (or how far it goes)? Simply by setting the tween property values themselves. For example, a wiggle to rotation:30 would be stronger than rotation:10. Remember, an ease just controls the ratio of movement toward whatever value you supply for each property in your tween. Sample code //Create a wiggle with 6 oscillations (default type:"easeOut") CustomWiggle.create("myWiggle", {wiggles:6}); //now use it in an ease. "rotation" will wiggle to 30 and back just as much in the opposite direction, ending where it began. TweenMax.to(".class", 2, {rotation:30, ease:"myWiggle"}); //Create a 10-wiggle anticipation ease: CustomWiggle.create("funWiggle", {wiggles:10, type:"anticipate"}); TweenMax.to(".class", 2, {rotation:30, ease:"funWiggle"}); Wiggling isn't just for "rotation"; you can use it for any property. For example, you could create a swarm effect by using just 2 randomized wiggle tweens on "x" and "y", as demonstrated here. CustomBounce GSAP always had the tried-and-true Bounce.easeOut, but there was no way to customize how "bouncy" it was, nor could you get a synchronized squash and stretch effect during the bounce because: The "bounce" ease needs to stick to the ground momentarily at the point of the bounce while the squashing occurs. Bounce.easeOut offers no such customization. There was no way to create the corresponding [synchronized] scaleX/scaleY ease for the squashing/stretching. CustomEase solves this now, but it'd still be very difficult to manually draw that ease with all the points lined up in the right spots to match up with the bounces. With CustomBounce, you can set a few parameters and it'll create BOTH CustomEases for you (one for the bounce, and one [optionally] for the squash/stretch). Again, think of CustomBounce like a wrapper that creates a CustomEase under the hood based on the variables you pass in. Options strength (Number) - a number between 0 and 1 that determines how "bouncy" the ease is, so 0.9 will have a lot more bounces than 0.3. Default: 0.7 endAtStart (Boolean) - if true, the ease will end back where it started, allowing you to get an effect like an object sitting on the ground, leaping into the air, and bouncing back down to a stop. Default: false squash (Number) - controls how long the squash should last (the gap between bounces, when it appears "stuck"). Typically 2 is a good number, but 4 (as an example) would make the squash longer in relation to the rest of the ease. Default: 0 squashID (String) - the ID that should be assigned to the squash ease. The default is whatever the ID of the bounce is plus "-squash" appended to the end. For example, CustomBounce.create("hop", {strength:0.6, squash:2}) would default to a squash ease ID of "hop-squash". How do you get the bounce and the squash/stretch to work together? You'd use two tweens; one for the position ("y"), and the other for the scaleX/scaleY, with both running at the same time: //Create a custom bounce ease: CustomBounce.create("myBounce", {strength:0.6, squash:3, squashID:"myBounce-squash"}); //do the bounce by affecting the "y" property. TweenMax.from(".class", 2, {y:-200, ease:"myBounce"}); //and do the squash/stretch at the same time: TweenMax.to(".class", 2, {scaleX:140, scaleY:60, ease:"myBounce-squash", transformOrigin:"center bottom"}); See the Pen CustomBounce from GreenSock by GreenSock (@GreenSock) on CodePen. Where can I get it? CustomWiggle and CustomBounce are membership benefits of Club GreenSock ("Shockingly Green" and "Business Green" levels). It's our way of saying "thanks" to those who support GreenSock's ongoing efforts. Joining Club GreenSock gets you a bunch of other bonus plugins and tools like MorphSVGPlugin as well, so check out greensock.com/club/ for details and sign up today.
 -
Hey everyone, I have hit a snag in my development. I have created a new timeline that i want to repeat once it finishes.It seemingly works but for some reason it doesn't start the repeat from the first tween but instead the second tween in the list tlMain = new TimelineMax({repeat:-1}); tlMain //I WANT the repeat to start from here in the timeline and play ALL tween below BUT... .fromTo(Pocket, 0.5, {scaleX: 3, scaleY: 3, autoAlpha: 0}, {scaleX: 1, scaleY: 1, autoAlpha: 1}) //Repeat seems to start here in the timeline instead, skipping the first part of my animation .fromTo(Pocket, 0.1, {scaleX: 1, scaleY: 1}, {scaleX: 1.04, scaleY: 1.04}, '-=0.05') .fromTo(Pocket, 0.15, {scaleX: 1.04, scaleY: 1.04}, {scaleX: 1, scaleY: 1}, '-=0.05') .fromTo(Crumbs1, 0.1, {x: '-10px', scaleX: 1.01, scaleY: 1.01, autoAlpha:0}, {x: '-5px', scaleX: 1, scaleY: 1, autoAlpha:1},"-=0.15") .fromTo(Crumbs2, 0.1, {x: '-10px', scaleX: 1.01, scaleY: 1.01, autoAlpha:0}, {x: '-5px', scaleX: 1, scaleY: 1, autoAlpha:1},"-=0.2") .fromTo(Crumbs3, 0.1, {x: '-10px', scaleX: 1.01, scaleY: 1.01, autoAlpha:0}, {x: '-5px', scaleX: 1, scaleY: 1, autoAlpha:1},"-=0.3") .fromTo(LogoContainer, 1, {y: '-175px'}, {y: '0px'}) .fromTo(line1, 0.25, {x: '-5px', autoAlpha:0}, {x: '0px', autoAlpha:1}) .fromTo(line2, 0.25, {x: '-5px', autoAlpha:0}, {x: '0px', autoAlpha:1}) .fromTo(line3, 0.25, {x: '-5px', autoAlpha:0}, {x: '0px', autoAlpha:1}) .repeat(-1).repeatDelay(2)//Repeat Call can anyone see why it repeats starting after the first tween instead of starting from the very beginning of the timeline?
-
 Download CustomEase Get CustomEase by creating a FREE GreenSock account which gets you access to our community forums plus you’ll receive our exclusive “GreenSock Insider” email series (you can unsubscribe anytime). Make sure you're logged in, then you’ll get immediately gain access to the download zip containing CustomEase. Note: CustomEase is not in the GitHub repository or CDN; it's only available for download at GreenSock.com. data:image/svg+xml,%3Csvg%20xmlns='http%3A//www.w3.org/2000/svg'%20viewBox='0%200%2084.25%2084.25'%3E%3Cdefs%3E%3Cstyle%3E.cls-1%7Bfill%3A%23FFF;%7D%3C/style%3E%3C/defs%3E%3Cpath%20class='cls-1'%20d='M42.12,0A42.13,42.13,0,1,0,84.25,42.12,42.17,42.17,0,0,0,42.12,0Zm0,77.25A35.13,35.13,0,1,1,77.25,42.12,35.17,35.17,0,0,1,42.12,77.25Z'/%3E%3Cpath%20class='cls-1'%20d='M53.38,41.25l-7.63,8V26.66a3.5,3.5,0,1,0-7,0V49.53l-7.69-7.69a3.5,3.5,0,1,0-4.95,4.95L39.78,60.46h0a5.17,5.17,0,0,0,.51.42l.2.11c.13.07.26.15.4.21l.26.08c.13,0,.26.09.4.12a3.17,3.17,0,0,0,.69.07h0c.12,0,.24,0,.36,0a1.65,1.65,0,0,0,.32,0,2.33,2.33,0,0,0,.25-.07,2.83,2.83,0,0,0,.41-.14l.21-.11a2.16,2.16,0,0,0,.39-.22l.2-.16c.11-.09.22-.18.32-.28l0,0L58.44,46.08a3.5,3.5,0,1,0-5.06-4.83Z'/%3E%3C/svg%3E Download GSAP (ZIP) Demos CustomEase Demos
- 4 comments
-
- 4
-
-

-
- easing
- featured-homepage
- (and 5 more)
-
Hi guys! Your community is awesome! I often read this forum but now I can not find an answer to my question. I need to make a responsive banner that stretches vertically and horizontally within certain limits (320x268 -> 1080x328). Inside this responsive container must play video. Advertising requirements are as follows: <script> function getUrlParam(name) { name = name.replace(/[\[]/, "\\[").replace(/[\]]/, "\\]"); var regex = new RegExp("[\\?&]" + name + "=([^]*)"), results = regex.exec(location.search); return results == null ? "" : decodeURIComponent(results[1].replace(/\+/g, " ")); } </script> <a id="click1_area" href="#" target="_blank">...</a> <a id="click2_area" href="#" target="_blank">...</a> <a id="click3_area" href="#" target="_blank">...</a> // After "<a href ...></a>" assign them to click handlers: <script> document.getElementById("click1_area").href = getUrlParam('link1'); document.getElementById("click2_area").href = getUrlParam('link2'); document.getElementById("click3_area").href = getUrlParam('link3'); </script> For Video: Thank you guys for any help!
-
I just finished creating 2 minutes animation with ~80 objects. I spend more time then i would we spend in after effects or photoshop, but i can make edits 10 times faster, then in Adobe programs. I already asked about UI and got an answer that Greensock using tweenui.com behind the scene (or vise versa). (I can't use this tool, because it's same "Adobe layers timeline system" that i am trying to get rid of using greensock.) One of the most time consuming thing was in the end - adding new object to my scene. 1. I create div element with a path to image source and id 2. I create var shortcut image_name = $("#image_name") (just realized this is not necessarry) 3. I set object to opacity:0 and showing it when it's time My question is - what technologies i can use to make this step easier? I think i should create json array and parser for it. And add image to json dynamicly. And create new array for this image that will have greensock .set function ... okay, my brain just pooped at that point. Can you give me a hint of what should i use? Thank you forum.
-
Hi i'm creating a banner and using gsap to do some particle animation, I need to keep the filesize down so i'm using TweenLite instead of TweenMax One thing that doesent seem to work with TweenLite is pauseAll? Is that correct, or do i need to add a plugin or something? Or, is there alternative way to mimick the TweenMax.pauseAll() with TweenLite Thanks
-
 Hello GSAP community! Been learning GSAP as of late and really loving it however i am stuck in developing this particular banner. I have set up all my html, css and JS created my ids and variables and developed a single timeline for animation. However it seems for some reason the timeline only plays the first 2 tweens and then stops even though i have more animation to follow. have a look at my codepen to see what i am trying to achieve here: https://codepen.io/Caderial/pen/LbYRVZ What i would like is to at first set mainScene, NYScene, NJScene, PAScene all to beoffscreen to the left by 322px. then the animation should kick in and slide in each scene and slide it back out then slide in the next scene and so on. But for some reason my first two timeline events happen with mainScene but then it stops? Please advise. I am also open to any alternative methods of bringing in pages/scenes into and out of view that may be better then my solution. thanks everyone!
 -
Any ideas on improving quality of text in an HTML5 Canvas ad from Adobe Animate CC? All text looks a bit fuzzy when publishing. Google search mentioned stage.snapToPixelEnabled = True; That helped a bit but our Campaign Managers are expecting a higher quality. There are tons of other scripts to scale the stage up and down which are actually mystifying to me. Not sure where to plug these methods into the .html and .js that Animate CC generates. Thanks in advance for the amazing brains out there. -Ray