
Search the Community
Showing results for 'normalize lerp clamp'.
-
 Hello im trying to achieve this effect with locomotive scroll Graphic hunters and here is the link to my code on GitHub and here it is live. I tried adding this javascript for scroll trigger and I also added the locomotive scroll for some reason it seems locomotive is maybe making it not work. gsap.registerPlugin(ScrollTrigger); // Call this function when the DOM content has loaded document.addEventListener("DOMContentLoaded", function() { // Initialize other functions like initLoaderHome(), initTimeZone() as needed initLoaderHome(); initMagneticButtons(); initTimeZone(); initBasicFunctions(); initScrolltriggerCheckScroll(); initScroll(); initScrolltriggerAnimations(); }); function initScroll() { let scroll = new LocomotiveScroll({ el: document.querySelector("[data-scroll-container]"), smooth: true, lerp: 0.075, }); scroll.on("scroll", ScrollTrigger.update); ScrollTrigger.scrollerProxy("[data-scroll-container]", { scrollTop(value) { return arguments.length ? scroll.scrollTo(value, 0, 0) : scroll.scroll.instance.scroll.y; }, getBoundingClientRect() { return { top: 0, left: 0, width: window.innerWidth, height: window.innerHeight }; }, pinType: document.querySelector("[data-scroll-container]").style.transform ? "transform" : "fixed", }); window.addEventListener('resize', () => { scroll.update(); ScrollTrigger.refresh(); }); ScrollTrigger.addEventListener("refresh", () => scroll.update()); ScrollTrigger.refresh(); } /** * Scrolltrigger Animations Desktop + Mobile */ function initScrolltriggerAnimations() { // Disable GSAP on Mobile // Source: https://greensock.com/forums/topic/26325-disabling-scrolltrigger-on-mobile-with-mediamatch/ ScrollTrigger.matchMedia({ // Desktop Only Scrolltrigger "(min-width: 1025px)": function() { if (document.querySelector(".bg-img")) { // Scrolltrigger Animation : Example $(".bg-img").each(function(index) { let triggerElement = $(this); let targetElement = $(this); let tl = gsap.timeline({ scrollTrigger: { trigger: triggerElement, start: "100% 100%", end: "150% 0%", scrub: 0, } }); tl.to(targetElement, { opacity: 0, ease: "Power3.easeOut" }); }); } }, // End Desktop Only Scrolltrigger // Mobile Only Scrolltrigger "(max-width: 1024px)": function() { if (document.querySelector(".example")) { // Scrolltrigger Animation : Example $(".example").each(function(index) { let triggerElement = $(this); let targetElement = $(".example"); let tl = gsap.timeline({ scrollTrigger: { trigger: triggerElement, start: "0% 100%", end: "100% 0%", scrub: 0 } }); tl.to(targetElement, { rotate: 90, ease: "none" }); }); } } // End Mobile Only Scrolltrigger }); // End GSAP Matchmedia } but it wont work for some reason, when I apply markers: true it shows fade working but it doesnt work when no markers. I also not my locomotive code is causing that javascript I provide to not work. thats why it wont fade. I have no idea why it would do that.
 -
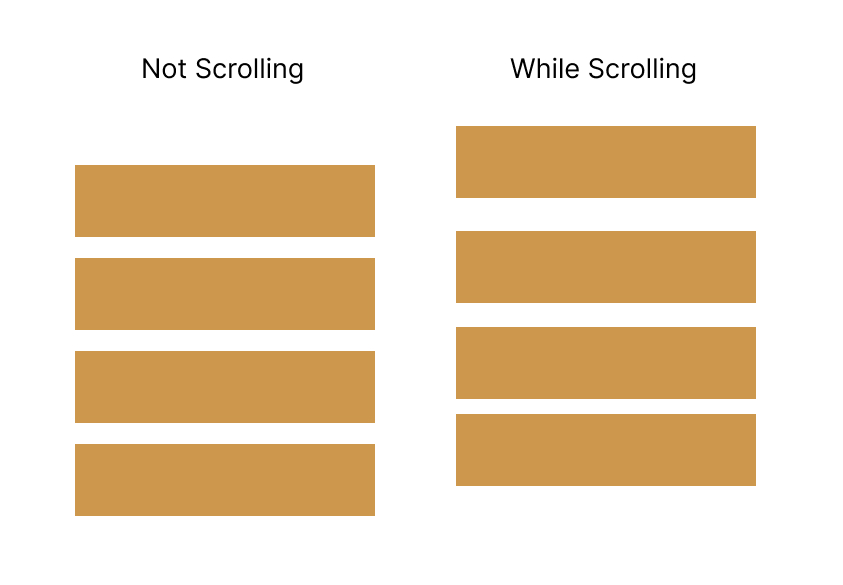
is it possible to make a lerp effect with gsap, I want when scrolling the distance between elements expands and returns to its original value again.
-
Ended up using pixi js, I leave the code here if someone need, I ll make a codepen if I will have spare time. <div class="background-effect flex items-center justify-center"> <canvas class="orb-canvas"></canvas> </div> <style> .background-effect { position: fixed; width: 100dvw; height: 100dvh; z-index: -1; } .orb-canvas { position: fixed; top: 0; left: 0; width: 100dvw; height: 100dvh; pointer-events: none; } </style> <script> import * as PIXI from "pixi.js"; import { gsap } from "gsap"; import { ScrollTrigger } from "gsap/ScrollTrigger"; import { createNoise2D } from "simplex-noise"; import { KawaseBlurFilter } from "@pixi/filter-kawase-blur"; import debounce from "debounce"; gsap.registerPlugin(ScrollTrigger); let app: PIXI.Application<PIXI.ICanvas> | null = null; function init() { if (!document.getElementById("hero-section")) { return; } if (app) { app = null; } // return a random number within a range function random(min, max) { return Math.random() * (max - min) + min; } // map a number from 1 range to another function map(n, start1, end1, start2, end2) { return ((n - start1) / (end1 - start1)) * (end2 - start2) + start2; } // Create a new simplex noise instance const noise2D = new createNoise2D(); // Orb class class Orb { // Pixi takes hex colors as hexidecimal literals (0x rather than a string with '#') constructor(fill = 0x000000, startAngle = 0) { // bounds = the area an orb is "allowed" to move within this.bounds = this.setBounds(); // initialise the orb's { x, y } values to a random point within it's bounds this.x = random(this.bounds["x"].min, this.bounds["x"].max); this.y = random(this.bounds["y"].min, this.bounds["y"].max); // how large the orb is vs it's original radius (this will modulate over time) this.scale = 1; // what color is the orb? this.fill = fill; // the original radius of the orb, set relative to window height this.radius = random(window.innerHeight, window.innerHeight * 1.5); // starting points in "time" for the noise/self similar random values this.xOff = random(0, 1000); this.yOff = random(0, 1000); // how quickly the noise/self similar random values step through time this.inc = 0.0001; // PIXI.Graphics is used to draw 2d primitives (in this case a circle) to the canvas this.graphics = new PIXI.Graphics(); this.graphics.alpha = 0.925; this.angle = startAngle ?? random(0, Math.PI * 2); // Random starting angle this.angularVelocity = 0.01; this.selfRotation = 0; // Initialize self-rotation angle this.selfRotationSpeed = 0.0015; // Speed of self-rotation } setBounds() { // how far from the { x, y } origin can each orb move const maxDist = window.innerWidth < 1000 ? window.innerWidth / 3 : window.innerWidth / 5; // the { x, y } origin for each orb (the bottom right of the screen) const originX = window.innerWidth / 1.25; const originY = window.innerWidth < 1000 ? window.innerHeight : window.innerHeight / 1.375; // allow each orb to move x distance away from it's x / y origin return { x: { min: originX - maxDist, max: originX + maxDist, }, y: { min: originY - maxDist, max: originY + maxDist, }, }; } update() { // self similar "psuedo-random" or noise values at a given point in "time" const xNoise = noise2D(this.xOff, this.xOff); const yNoise = noise2D(this.yOff, this.yOff); const scaleNoise = noise2D(this.xOff, this.yOff); // map the xNoise/yNoise values (between -1 and 1) to a point within the orb's bounds this.x = map(xNoise, -1, 1, this.bounds["x"].min, this.bounds["x"].max); this.y = map(yNoise, -1, 1, this.bounds["y"].min, this.bounds["y"].max); // map scaleNoise (between -1 and 1) to a scale value somewhere between half of the orb's original size, and 100% of it's original size this.scale = map(scaleNoise, -1, 1, 0.5, 1.1); // step through "time" this.xOff += this.inc; this.yOff += this.inc; // Circular motion parameters const centerX = window.innerWidth / 2; const centerY = window.innerHeight / 2; const radius = window.innerWidth < 1000 ? window.innerHeight * 1.1 : window.innerHeight; // Adjust the radius as needed // Calculate new x and y based on the angle this.x = centerX + radius * Math.cos(this.angle); this.y = centerY + radius * Math.sin(this.angle); // Update the angle for the next frame this.angle += this.angularVelocity; // Normalize the angle to prevent overflow if (this.angle > Math.PI * 2) { this.angle -= Math.PI * 2; } // Update the self-rotation angle this.selfRotation += this.selfRotationSpeed; // Normalize the self-rotation angle to prevent overflow if (this.selfRotation > Math.PI * 2) { this.selfRotation -= Math.PI * 2; } } render() { // update the PIXI.Graphics position and scale values this.graphics.x = this.x; this.graphics.y = this.y; this.graphics.scale.set(this.scale); // Apply the self-rotation transformation this.graphics.rotation = this.selfRotation; // clear anything currently drawn to graphics this.graphics.clear(); // tell graphics to fill any shapes drawn after this with the orb's fill color this.graphics.beginFill(this.fill); // draw a circle at { 0, 0 } with it's size set by this.radius this.graphics.drawEllipse(0, 0, this.radius, this.radius / 1.2); // let graphics know we won't be filling in any more shapes this.graphics.endFill(); } } // Create PixiJS app app = new PIXI.Application({ // render to <canvas class="orb-canvas"></canvas> view: document.querySelector(".orb-canvas"), // auto adjust size to fit the current window resizeTo: window, autoStart: false, // transparent background transparent: true, antialias: true, }); // Function to render the scene function renderScene() { app.renderer.render(app.stage); } // Create a separate container for the mask const maskContainer = new PIXI.Container(); // Create a container for orbs const orbContainer = new PIXI.Container(); // Create a graphics object to act as the background const background = new PIXI.Graphics(); background.beginFill(0x02fdfe); // Replace with your desired background color background.drawRect(0, 0, app.screen.width, app.screen.height); background.endFill(); // Add the background to the container orbContainer.addChild(background); maskContainer.addChild(orbContainer); app.stage.addChild(maskContainer); orbContainer.filters = [new KawaseBlurFilter(50, 10, true)]; // Set color to #f0a0c5 in exadecimal const color = 0xf0a0c5; // Create a circular mask const mask = new PIXI.Graphics(); // Function to redraw the mask function redrawMask(newRadius) { mask.clear(); mask.beginFill(0x02fdfe); mask.drawCircle(window.innerWidth / 2, window.innerHeight / 2 + window.innerHeight / 4, newRadius); mask.endFill(); } // Initial radius of the mask const initialRadius = 45; // Set your initial radius // Object with a property for the radius const maskRadiusObj = { radius: initialRadius }; maskContainer.addChild(mask); // Add the mask to the mask container const button = new PIXI.Graphics(); // Function to redraw the button function redrawButton(newRadius: number) { button.clear(); button.beginFill(0x000000); button.drawCircle(window.innerWidth / 2, window.innerHeight / 2 + window.innerHeight / 4, newRadius); button.endFill(); } const buttonRadiusObj = { radius: initialRadius - 7 }; maskContainer.addChild(button); function setupScrollTrigger() { gsap.timeline({ defaults: { ease: "power1.inOut" }, scrollTrigger: { scrub: 0.1, start: `500 top`, end: `900 top`, markers: false, pinSpacing: false, }, }) .fromTo( maskRadiusObj, { radius: maskRadiusObj.radius, // Radius to fill the screen }, { radius: Math.max(window.innerWidth, window.innerHeight), // Radius to fill the screen onUpdate: () => { redrawMask(maskRadiusObj.radius); renderScene(); // Call renderScene on radius update }, }, ) .fromTo( buttonRadiusObj, { radius: buttonRadiusObj.radius, }, { radius: 0, onUpdate: () => { redrawButton(buttonRadiusObj.radius); renderScene(); // Call renderScene on radius update }, }, "<", ); } // GSAP animation to expand the radius setTimeout(function () { if (window.scrollY <= 50) { // Initial animation timeline let initialTimeline = gsap .timeline({ defaults: { duration: 0.8, ease: "back.out(1.4)" } }) .fromTo( maskRadiusObj, { radius: 0, }, { radius: initialRadius, // Radius to fill the screen onUpdate: () => { redrawMask(maskRadiusObj.radius); renderScene(); // Call renderScene on mask update }, }, ) .fromTo( buttonRadiusObj, { radius: 0, }, { radius: initialRadius - 7, onUpdate: () => { redrawButton(buttonRadiusObj.radius); renderScene(); // Call renderScene on button update }, }, ">-=0.5", ) .then(() => { setupScrollTrigger(); }); } else { // Directly setup ScrollTrigger if scroll is more than 100 setupScrollTrigger(); } }, 50); // Create orbs const orb1 = new Orb(color, 0); // First orb starts at angle 0 const orb2 = new Orb(color, Math.PI); // Second orb starts 180 degrees (π radians) opposite orbContainer.addChild(orb1.graphics); orbContainer.addChild(orb2.graphics); // Apply the mask to the stage app.stage.mask = mask; // Function containing the ticker logic function renderOrbs() { orb1.update(); orb1.render(); orb2.update(); orb2.render(); renderScene(); } renderOrbs(); const fps = 30; const fpsInterval = 1000 / fps; let then = Date.now(); function startAnimationLoop() { requestAnimationFrame(startAnimationLoop); const now = Date.now(); const elapsed = now - then; if (elapsed > fpsInterval) { // Adjust for specified fps then = now - (elapsed % fpsInterval); renderOrbs(); // Render your scene } } // Flag to indicate if the ticker has started let tickerStarted = false; // Named function for the scroll event function handleScroll() { if (window.scrollY > window.innerHeight / 1.1 && !tickerStarted) { startAnimationLoop(); tickerStarted = true; // Remove the event listener window.removeEventListener("scroll", handleScroll); } } // Scroll event listener // Add the scroll event listener window.addEventListener("scroll", handleScroll); } document.removeEventListener("DOMContentLoaded", init); // astro:page-load document.addEventListener("DOMContentLoaded", init); // astro:page-load </script>
-

Create looping animation without need for .set before
mvaneijgen replied to SamStAubyn's topic in GSAP
Your thought process is not wrong, but I think you have a logic issue here. You have a timeline with ScrollTrigger and are adding that to a master timeline which also includes another timeline, when should that later timeline start animating? I know you want to animate when the ScrollTrigger is done, but that would not work like this. I've removed your master timeline (btw I would not use TimelineMax that is from an old version of GSAP you can now just directly call gsap.timeline()). I've also removed the function of your ScrollTrigger timeline and have it do it's thing on page load, then I've added an onLeave call back to you ScrollTrigger that fires when you leave the ScrollTrigger eg when it is done animating and then I call your function bobInfinite(). I've also add a clamp to your ScrollTrigger, now it will only start animating when the visitor has really scrolled. Hope it helps and happy tweening! https://codepen.io/mvaneijgen/pen/RwdOgwa?editors=0011 If you want to know why the calculations where all off, this is because GSAP records all the values on page load an then when it needs to animate it just does that, so in your demo on page load it would see where all the dots are and record there positions, but then when everything was done all the positioned changed and all the calculations it did where off. Right now the onLeave ensures that the moment GSAP does it's calculations the elements are at their final position and thus all the calculations are correct -
I would set a scale on the image (maybe calculate how much you need the scale to be based ont the window.hight and the image height). Also set the image to object fit cover and add a clamp to the ScrollTrigger, so that it always starts from a point even if it already should be playing. Check out for an explanation. I've modified your pen a bit, to visually see where the image is and the red border shows where it's clipping it off. Hope it helps and happy tweening! https://codepen.io/mvaneijgen/pen/gOEyLLO
- 1 reply
-
- 2
-

-
Invert the wheelSpeed to a negative value then. And for bounds, you will need to apply JavaScript logic to calculate those and clamp the numbers in the callback.
-
@mvaneijgen Thank you so much for this! So your approach DID work, but for some reason, it made everything so glitchy and slow. however, it did maintain the header/footer of the browser to remain all the time, oh and I cannot PULL TO REFRESH using this approach , maybe I'm doing something wrong? So I tried " ScrollTrigger.config({ ignoreMobileResize: true}) " which I got from the document you provided, and it worked even better. Normalize Scroll Approach: https://candid-churros-7c0625.netlify.app/index2.html Ignore Resize approach: https://candid-churros-7c0625.netlify.app/ Thank you for pointing me in the right direction much appreciated.
-

normalizescroll ScrollTrigger: Normalize scroll on custom scroller
Grommas Dietz posted a topic in GSAP
Hey there Thanks for all your tools, the updates and new features. Really appreciate and love to work with it! Is it possible to normalize scroll on custom scrollers in future releases of ScrollTrigger? Currently the normalisation only works for the overall page, similar to ScrollSmoother, right? The CodePen provided is just a quick test in reference. Comment out ScrollTrigger.normalizeScroll(true); to see how it breaks the scrolling. -
Hey @Rodrigo, Thanks for the recommendations here! I have implemented them and everything is much smoother. My message above was about creating a lerp type of effect fpr the cards using the velocityY property - that's what that this chunk is trying to do using onUp or onDown: const posSetter = gsap.quickSetter(cards, "x", "%"); const clamp = gsap.utils.clamp(-20, 20); const lerp = [8, 16, 24]; const proxy = { x: 0 }; Observer.create({ target: cardItems, type: "wheel,touch,pointer", onUp: (self) => { let lapsedProgress; if (lapsedProgress === 1) return; lapsedProgress = scrollTl.progress() - 0.075; progressTo(lapsedProgress); const x = clamp((self.velocityY / -300) * lerp[Math.floor(Math.random() * lerp.length)]); if (Math.abs(x) > Math.abs(proxy.x)) { proxy.x = x; gsap.to(proxy, { x: 0, duration: 0.8, ease: "none", overwrite: true, onUpdate: () => posSetter(proxy.x) }); } }, }) I guess this is a better example of what i'm trying to do, but wanted to use the velocityY property: https://codepen.io/GreenSock/pen/wvMeNee?editors=0010 Do you think this is doable or should I go down the route of the above example? Here is the updated Codepen for reference: https://codepen.io/jackkemm/pen/RwearyE?editors=0011 EDIT: One thing I noticed too, on mobile/touch devices, the scroll is in the opposite direction. I have tried adding -1 to wheelSpeed and scrollSpeedfor touch devices but the scroll is still in the opposite direction. Is there a way to change this? Thanks, Jack
-
 Hello! I'm new to the world of GSAP, although I have experience with CSS. I'm using NextJS 14 in my project. I've watched quite a few videos from GSAP, but I haven't found any discussing clearing inline styles with scrub: true. I have an image positioned in the center of the screen using position: absolute, and I've used GSAP animations to make it go fullscreen on scroll. My problem is that when I resize the screen, it simply enlarges to the original size instead of adjusting to the current size. I've tried various units to specify the width for GSAP, such as using percentages (100%), viewport width (100vw), or window.innerWidth, but none seem to work properly for achieving fullscreen. I don't understand this behavior because it seems to convert the inline style to pixels even when I specify percentages. I've seen in multiple videos that the GSAP team emphasizes not worrying about units, but I've only encountered problems. For instance, I set the image to have a width of 200px in CSS and specified 100% width as the target value in GSAP. Even before the scroller reaches the trigger start, it applies some inline style causing the image to widen. However, if I use window.innerWidth, there's no change in size. But the main issue still remains with responsiveness. If I give GSAP 50%, why doesn't it render that in the inline style? Why does it convert it to pixels? This makes it completely unresponsive, and I have no idea how to make it adjust to fullscreen when the size changes. Is there a way to clear the GSAP inline style when a screen size is changed (I don't mean breakpoints, I know about gsap.matchMedia(), but it is not a solution for this) and recalculate it? I'd be incredibly grateful for any help. Thanks in advance! Here is my css: .img-container { position: relative; } .hero-cont { position: relative; display: flex; flex-direction: column; min-height: 100svh; overflow-x: hidden !important; } .hero__content { width: 100%; margin-top: 28vh; .hero__title { font-size: clamp(3rem, 6vw + 0.1rem, 5rem); font-weight: 600; line-height: 1.1; letter-spacing: 1px; margin-bottom: 30px; } .hero__text { font-size: clamp(1rem, 6vw + 0.1rem, 1.5rem); max-width: 35ch; } } .hero__bg { position: absolute; z-index: -1; object-fit: cover; } .hero-img__container { position: absolute; height: 60%; width: 200px; // left: 25%; position: absolute; left: 0; right: 0; top: 25%; margin-inline: auto; rotate: 15deg; // transform: translate(-30%, -50%); z-index: -1; border: 1px solid white; border-width: 15px 15px 40px 15px; box-shadow: 4px 4px 10px rgba(0, 0, 0, 0.2); // transition: all 400ms ease-in; .hero-photo__img { object-fit: cover; width: 100%; height: 100%; } } Here is my component: 'use client'; import { useEffect, useLayoutEffect, useRef, useState } from 'react'; import Hero from '@/components/Hero'; import gsap from 'gsap'; import { ScrollTrigger } from 'gsap/ScrollTrigger'; import Image from 'next/image'; const heroImg = '/assets/images/hero/hero2.webp'; const heroPhotoImg = '/assets/images/hero/hero-photo.webp'; export default function Home() { const heroComp = useRef(null); useLayoutEffect(() => { gsap.registerPlugin(ScrollTrigger); let ctx = gsap.context(() => { let tl = gsap.timeline({ scrollTrigger: { trigger: heroComp.current, //trigger start: '+=10 top', end: 'bottom top', toggleActions: 'play', scrub: true, markers: true, pin: true, }, }); tl.to('.hero-img__container', { left: 0, top: 0, borderWidth: 0, transform: 'rotate(0)', height: '100%', width: window.innerWidth, }); tl.to('.hero__content', { opacity: 0, }); }, heroComp); return () => { ctx.revert(); }; }, []); return ( <> {/* <Hero /> */} <section ref={heroComp} className='hero-cont cont full-size'> <Image src={heroImg} alt='hero' className='hero__bg' fill /> <div className='hero__content'> <h1 className='hero__title'> Beautiful Moment <br /> is Everything </h1> <p className='hero__text'>Lorem ipsum dolor sit amet consectetur adipisicing elit. Aut, tempora?</p> </div> <div className='hero-img__container'> <Image fill src={heroPhotoImg} alt='hero' className='hero-photo__img' /> </div> </section> </> ); }
 -
Hi @Ops srl and welcome to the GreenSock forums! Thanks for being a Club GreenSock member and supporting GreenSock! ? Since version 3.12 you can clamp your triggers to avoid that: smoother.effects(".hero__image-cont", { speed: () => ( `clamp(${gsap.utils.random(0.55, 0.85, 0.05)})`) }); From the ScrollSmoother docs: clamp() speed effects Have you ever had an element that you natively placed toward the very top of your page but when you apply a data-speed, it starts out shifted from its native position? That's because by default, speed effects cause elements to reach their "native" position when centered vertically in the viewport, so they'll likely start out offset. Starting in version 3.12, you can wrap your speed value in "clamp()" to make them start out in their native position if they're "above the fold" (inside the viewport when scrolled to the very top). Under the hood, data-speed effects are driven by ScrollTrigger instances, so this a way to employ ScrollTrigger's clamp() feature that prevents the start/end values from "leaking" outside the page bounds (never less than 0 and never more than the maximum scroll position). Here is a fork of your demo: https://codepen.io/GreenSock/pen/QWJZzRQ That's a very nice effect, great work! Hopefully this helps. Happy Tweening!
- 1 reply
-
- 2
-
-
Hi, You can use GSAP's Clamp utility method to prevent the circle from moving out of the bounds. Here is a super simple demo I whipped: https://codepen.io/GreenSock/pen/VwgqrGm https://gsap.com/docs/v3/GSAP/UtilityMethods/clamp() Hopefully this helps. Happy Tweening!
-
Here is the showcase of my problem, on a clean new project: https://gsaptest2.netlify.app/ Please try to resize the window, after loaded the images. style.scss *, *::before, *::after { margin: 0; padding: 0; box-sizing: border-box !important; text-decoration: none; list-style: none; // outline: 1px solid rgb(255, 0, 0); } .img-container { position: relative; } .hero-cont { position: relative; display: flex; flex-direction: column; min-height: 100svh; } .hero__content { width: 100%; margin-top: 28vh; .hero__title { font-size: clamp(3rem, 6vw + 0.1rem, 5rem); font-weight: 600; line-height: 1.1; letter-spacing: 1px; margin-bottom: 30px; } .hero__text { font-size: clamp(1rem, 6vw + 0.1rem, 1.5rem); max-width: 35ch; } } .hero__bg { position: absolute; z-index: -1; object-fit: cover; } .hero-img__container { position: absolute; height: 60%; width: 400px; // left: 25%; position: absolute; left: 0; right: 0; top: 25%; margin-inline: auto; rotate: 15deg; // transform: translate(-30%, -50%); z-index: -1; border: 1px solid white; border-width: 15px 15px 40px 15px; box-shadow: 4px 4px 10px rgba(0, 0, 0, 0.2); // transition: all 400ms ease-in; .hero-photo__img { object-fit: cover; width: 100%; height: 100%; } } page.tsx: 'use client'; import { useLayoutEffect, useRef } from 'react'; import gsap from 'gsap'; import Image from 'next/image'; import { ScrollTrigger } from 'gsap/ScrollTrigger'; const heroImg = '/assets/images/hero/hero2.webp'; const heroPhotoImg = '/assets/images/hero/hero-photo.webp'; export default function Home() { const heroComp = useRef(null); useLayoutEffect(() => { gsap.registerPlugin(ScrollTrigger); let ctx = gsap.context(() => { let tl = gsap.timeline({ scrollTrigger: { trigger: heroComp.current, //trigger start: '+=10 top', end: 'bottom top', toggleActions: 'play', scrub: true, markers: true, pin: true, }, }); tl.to('.hero-img__container', { left: 0, top: 0, borderWidth: 0, transform: 'rotate(0)', height: '100%', width: window.innerWidth, }); tl.to('.hero__content', { opacity: 0, }); }, heroComp); return () => { ctx.revert(); }; }, []); return ( <main > <section ref={heroComp} className='hero-cont cont full-size'> <Image src={heroImg} alt='hero' className='hero__bg' fill /> <div className='hero__content'> <h1 className='hero__title'> Beautiful Moment <br /> is Everything </h1> <p className='hero__text'>Lorem ipsum dolor sit amet consectetur adipisicing elit. Aut, tempora?</p> </div> <div className='hero-img__container'> <Image fill src={heroPhotoImg} alt='hero' className='hero-photo__img' /> </div> </section> </main> ); }
-
Hi, Is great that you were able to solve it! Yeah it's always a good idea to use box-sizing: border-box; by default in a global way: * { box-sizing: border-box; } Most CSS frameworks (bootstrap, tailwind, normalize, etc) use that particular selector, so it's always a good idea to set it yourself if you're not using a CSS library. Finally I wish I can tell you that this is going to be the last time you'll invest a considerable amount of time trying to solve something trivial, but I can guarantee you that this will happen again (happens to all of us), so just learn from it and keep going! Happy Tweening!
-
That is a matter of logic first and foremost. Have you taken a look at the link for the utils I used in my pen that I included above? https://greensock.com/docs/v3/GSAP/gsap.utils This is what the docs say about .clamp(), the first method I use in the onDrag callback: https://greensock.com/docs/v3/GSAP/UtilityMethods/clamp() I used that in my example because I specifically did not want the moved-value to go beyond 0 in one direction and beyond the window's innerWidth in the other direction at any given point - so now it won't update beyond 0 if you drag to the left e.g . Now from a logical point of view, when wanting to have it loop seamlessly in any direction, that is exactly the behaviour that you will not want then. You'll want to allow that value to update further when you drag to the left e.g. - but you also need to wrap it around to the opposite edge of your given range once it hits any of the edge values. And there is another handy util that will do exactly that for you - .wrap() - please have a read in the docs. Here's a broken down explanation of what it does iny my own words, leaned on the explanation for clamp: It also technically 'clamps' a number between a given minimum and maximum - but with a twist. If the number you provide is less than the minimum, it will return the maximum instead. If it's greater than the maximum, it returns the minimum instead. If it's between the minimum and maximum, it returns the number unchanged. https://greensock.com/docs/v3/GSAP/UtilityMethods/wrap() So actually for my example to become inifinitely looping in any direction, it would be as easy as replacing the method clamp() with wrap() [and of course change the frames in the .fromTo lottieTween accordingly, like you already did on your own]. That should work more like you had in mind, right? https://codepen.io/akapowl/pen/dywoEOL
-
 Hello! Thank you very much for such an amazing library! I've been using locomotive scroll for some time to achieve smooth scroll, but I had occasional performance issues when I would use power save mode on my laptop. So I decided to become a club member and use scrollsmoother. After removing locomotive related code and updating JavaScript , website started to work perfectly on desktops, even on power save mode! But unfortunately on my phone and tablet performance dropped drastically and way worse than used to be. Address bar would show/hide sometimes despite setting normalize scroll to "true". After setting normalize scroll to "false", performance gets slightly better, but still very jumpy... I would provide codepen demo but I am not sure what causing this behavior on phone and tablet and which part to isolate and put in codepen. I really don't want to go back to using locomotive scroll, but it had better performance on mobile which doesn't make any sense. I am sure I am doing something wrong, but can't figure out what... I would appreciate any help and advice! this is demo https://gsap-test-smoothscroll.netlify.app/ this is javascript snippet I use // create the scrollSmoother before your scrollTriggers let scroller = ScrollSmoother.create({ wrapper: "#smooth-wrapper", content: "#smooth-content", normalizeScroll: true, ignoreMobileResize: true, smooth: 2.5, // how long (in seconds) it takes to "catch up" to the native scroll position effects: true, // looks for data-speed and data-lag attributes on elements smoothTouch: 0.3, // much shorter smoothing time on touch devices (default is NO smoothing on touch devices) });
 -
ScrollSmoother, data-speed and first/last folds
GreenSock replied to Webit Interactive's topic in GSAP
Alright, I've been rethinking this API. Instead of "+=" and "-=" prefixes on the speed and then having some other way of handling the scaling animations as you described, @Webit Interactive, I think it'd be cleaner and more intuitive to use a "clamp()" wrapper across the board which basically means "don't let the ScrollTrigger's start position be LESS THAN 0, nor the end position GREATER THAN the page's maximum scroll". // you can put any valid start/end value inside the clamp() start: "clamp(top bottom)", end: "clamp(bottom top)" And then for data-speed: data-speed="clamp(0.5)" So here's a forked CodePen of the original with clamp() in place with beta files: https://codepen.io/GreenSock/pen/BaqzJrM?editors=1010 And here's a fork of your scale demo with clamp() in place: https://codepen.io/GreenSock/pen/QWZEaZL This way, we've got a consistent way to tell ScrollTrigger to limit the start/end of the associated ScrollTriggers. Thoughts? Suggestions? @andrius.petravicius I'd love to hear your thoughts too. Please feel free to hammer on those beta files to see if you can get any odd behavior. Also feel free to suggest a different API design for this kind of feature. -

Problems with jumping scroll on mobile scrolltriggers
luisglez2212 replied to AllenIVe's topic in GSAP
Unfortunately none of the solutions helped me (I fixed the Locomotive Scroll implementation with Scroll Trigger) but I've found one. When setting up the mobile and tablet scroll for Locomotive Scroll, I deactivated the smooth in order to maintain the vanilla scroll of the browser as Locomotive Scroll gives a really slow scroll on mobile. This is what caused the problem. However, if you put a touchMultiplier instance to Locomotive Scroll you can actually replicate the vanilla scrolling speed. My set up looks like this now: const locoScroll = new LocomotiveScroll({ el: document.querySelector(".scroll-smooth"), smooth: true, multiplier: 0.25, lerp: 0.035, touchMultiplier: 9, tablet: { smooth: true, breakpoint: 0, lerp: 0, }, mobile: { smooth: true, breakpoint: 0, lerp: 0, }, }); It's not the optimal solution if you want to quit smooth scrolling for mobile...but for me it works. -
You are using the default start/end positions for your ScrollTrigger which is: start: "top bottom", // when the top of the trigger hits the bottom of the viewport end: "bottom top" //when the bottom of the trigger hits the top of the viewport Therefore, since you've set things up such that the trigger element is ALREADY in the viewport, the start would be negative (you'd have to scroll backwards to make the top of the trigger hit the bottom of the viewport), so your tween is starting mid-progress! Don't worry - you can just use clamp(). 🙂 I'd strongly recommend watching this video: https://codepen.io/GreenSock/pen/xxBRraq Does that help?
- 1 reply
-
- 3
-
-

-
Hi, I'm trying to edit a GSAP example called horizontalLoop() I would like to add a scroll listener so that when you scroll up or down anywhere inside the .wrapper, it makes the carousel go left or right, infinitely. I'd like it to have some lerp or inertia on scroll, and I don't need snapping. What method would you recommend to do this? Side note: the horizontalLoop() official GSAP example sometimes goes crazy with drag velocity going extremely high all of a sudden. Has there been an update on this GSAP example where it doesn't do this? (It does it on my CodePen too)
-
Hi! I do a lot of research but i can't resolve this thing. Maybe it's the delta normalization of smoothscroller. As you can see in my pen if you scroll really fast the animation is not smooth. It is an easier example of a complicated morph particles on scroll in threejs but the fact is the same. I try to use preventOverlaps and fastScrollEnd but maybe i can't understand as they works. If look at this website: https://dnacapital.com/ and try a big scroll it is has a very good normalization of delta. So i think i have 2 problems: 1 is to understand as preventOverlaps and fastScrollEnd works and second the delta of the scroll. Can anyone help me? Thank you
-
Hello folks ?, I am using Draggability from desandro (https://draggabilly.desandro.com) in order to create 2 draggable images in a menu. I have set a lerp effect to them which I find super nice. It works well but I am looking to optimize my code and I think that draggable + inertia plugin can gave me a better results in term of performance. If you have some ideas or advises for building these draggable images using gsap plugins, it would be super nice ! (example of my code using Draggability is on the codepen link) Thank you all, Benjamin
-

Why does the animation move first before windows finishes loading?
Cassie replied to Bayu Handono's topic in GSAP
Hiya - Your loader isn't tied to any loading state at all - it's simply a delayed tween that's fading a black div. The following animations also don't have any association with that loader or the imaginary loading time at all. Their starting points are triggered when a specific scroll point is passed - on page load the first element's trigger point is already passed - so the animation plays immediately. https://codepen.io/GreenSock/pen/bGzGdZd?editors=0010 If you'd like to wait until the user scrolls you could clamp your triggers? You'll need to update to a more recent version though, your pen is using old versions of GSAP & ScrollTrigger. https://gsap.com/blog/3-12/#:~:text=Clamp Your Triggers,where your triggers are placed. https://codepen.io/GreenSock/pen/bGzGdZd?editors=0010 Alternatively - you could refactor so that all the images below the fold are triggered by scrollTrigger but the top image and the loader are on a timeline. https://codepen.io/GreenSock/pen/YzBzXog?editors=0010 Hope this helps! -
Hi, In your example the code image and the notebook are not aligned properly, there is basically no CSS in your example, just this: .App { font-family: sans-serif; text-align: center; } As much as we love to help, we don't have the time resources to create custom solutions for our users, especially create/solve HTML and/or CSS problems for them. Also this is an issue as well: let tl = gsap.timeline(); tl.fromTo( mbEl, { scale: 1 }, { scale: 0.75, scrollTrigger: { trigger: hivEl, markers: true, start: "clamp(top center)", end: () => `clamp(bottom+=${mbEl.height * 8} top)`, onEnter: () => { mbEl.style.top = "0px"; }, onEnterBack: () => { mbEl.style.top = "0px"; }, scrub: 1, pin: mbEl } } ); ScrollTrigger configurations shouldn't go on an instance inside a Timeline. The reason is that it creates a logic problem. A GSAP Timeline controls the playhead position of the instances that you add to the timeline. ScrollTrigger on the other hand controls the playhead position of GSAP instances based on the current scroll position, so in this case you have both ScrollTrigger and the Timeline fighting for setting the position of that instance's playhead resulting in unexpected behaviour. When using Timelines just add the ScrollTrigger configuration to the timeline: let tl = gsap.timeline({ scrollTrigger: { trigger: hivEl, markers: true, start: "clamp(top center)", end: () => `clamp(bottom+=${mbEl.height * 8} top)`, onEnter: () => { mbEl.style.top = "0px"; }, onEnterBack: () => { mbEl.style.top = "0px"; }, scrub: 1, pin: mbEl } }); tl.fromTo( mbEl, { scale: 1 }, { scale: 0.75, } ); For scrubbing video with ScrollTrigger, please refer to these threads: Finally in this cases is far better to get everything working without ScrollTrigger. Once you have the HTML/CSS in the way you need and your GSAP animation works how you intend, only then you plug ScrollTrigger to the mix: Hopefully this helps. Happy Tweening!
-

Prevent initial "jump" on first Scrolltrigger target
marco_sohn replied to marco_sohn's topic in GSAP
@GreenSock thank you for the helpful inputs. I really appreciate it! Clamp seems to be the solution I was looking for. If I somehow still encounter any issues I'll gladly fall back to the post about «fouc». For anyone wondering, i'll post the pen with clamp below: https://codepen.io/mschuler/pen/abPxWxO Kind regards


