
Leaderboard


Popular Content
Showing content with the highest reputation on 02/12/2024 in all areas
-
When working with ScrollTrigger it is best to let ScrollTrigger handle all the pinning, so you're better of leaving position: fixed out of your CSS this wil ScrollTrigger inject in to the page when you need it. I've modified @Toso pen a bit to remove and set scrub: false and included the toggleActions, with this you can tell ScrollTrigger what to do with the animation when certain triggers are met https://gsap.com/docs/v3/Plugins/ScrollTrigger/ check out the docs for a full explanation. So if you scroll now the green makers will touch and it will make the header fixed (eg pin: true) and 1 second later it will grow the header. In ScrollTrigger land there is no watch for second scroll, it just play your animations of the triggers are met, so you could build two ScrollTriggers one for pinning and the other for the scaling, but that makes everything much more complex, so when starting out I would start simple and slowly build things out when you understand how to the tool work. Hope it helps and happy tweening! https://codepen.io/mvaneijgen/pen/MWxPNdZ?editors=01004 points
-
Have you tried creating two shapes and then morphing them? That would be the most simple solution. What you also can do is write out the path by hand and then update individual points directly with code, to me this is really magic and hard to understand, but with it you get the most control over what the animation is doing. Chris Gannon did a tutorial how you could go about doing this might be a good starting point. Hope it helps and happy tweening! https://codepen.io/chrisgannon/pen/KKpzMJd?editors=00103 points
-
after spending some time trying to make it work I found that you forgot to add the gsap and ScrollTrigger 😂and found some issues in your demo so I created a small demo with the animation you need 🫡 https://codepen.io/ahmed-attia/pen/OJqBKRX3 points
-
Hey there! So the timeline is working, but you're trying to stagger multiple elements *inside* a for loop (where you only have access to one element at a time) Rather than stagger, you could do something like this where you define the timeline outside of the loop, then loop round and add each line to the timeline const timeline = gsap.timeline(); const titles = gsap.utils.toArray<Element>('p', container.current); // loop round the titles titles.forEach((title) => { const splitTitle = new SplitText(title); // add each title to the timeline timeline .from(splitTitle.lines, { opacity: 0, y: 20 }) .to(splitTitle.lines, { opacity: 0, y: -20 }); }); https://stackblitz.com/edit/stackblitz-starters-mcygak?file=app%2Fpage.tsx Alternatively you could push all the lines into an array and then stagger them - something like this const titles = gsap.utils.toArray<Element>('p', container.current); const lines = [] // loop round the titles titles.forEach((title) => { const splitTitle = new SplitText(title); lines.push(splitTitle.lines) }); // add each title to the timeline gsap.timeline() .from(lines, { opacity: 0, y: 20, stagger: 0.2 }) .to(lines, { opacity: 0, y: -20, stagger: 0.2 }); (sorry I don't understand typescript to adjust that for you) Hope this helps!2 points
-
This community is the best and so are you! Thank you a lot I couldn't figure out how to fix it!! Thank you for your time and your help!2 points
-
Absolutely spot on, can't believe I missed it in the docs. Sometimes you can't see the wood for the trees and all that... Thanks for the prompt response Jack, very much appreciated2 points
-
That is the biggest people have when working the tools. The best thing to do when working with ScrollTrigger is to remove it! This seems counter intuitive, but ScrollTrigger is just animating something on scroll, so just focus on the animation at first and only when you're happy with the animation add ScrollTrigger back in. This way you can focus on one part at a time and it will save a lot of headache when debugging. Check out this demo from my guide. It already is 80% what you want, you can even uncomment the ScrollTrigger code to see how it would work on scroll. Then it will be just the fact of laying out all the elements like you want and building the animation. And this guide walks you through how you could do this There is not going to be a demo that is 100% what you want, that is where you as he developer come in and have to tweak the properties to get them to do what you want. https://codepen.io/mvaneijgen/pen/ExMYQyO2 points
-
Here's an oldie but a goodie from our own @OSUblake. Should give you some ideas. https://codepen.io/osublake/pen/oGoyYb1 point
-
Hi, Hopefully these demos help you: https://codepen.io/GreenSock/pen/zYaxEKV https://codepen.io/GreenSock/pen/GRwePYw Happy Tweening!1 point
-
Hi, Maybe this demo is a better starting point: https://codepen.io/GreenSock/pen/bGKaMbo Hopefully this helps. Happy Tweening!1 point
-
Hey seems like @chrisgannon has been hiding this gem from us, now there is no choice but the bookmark Chris' youtube channel as well 😆 Thanks for sharing that Mitchel!! 👏1 point
-
I hadn't seen this video! What a gem!1 point
-
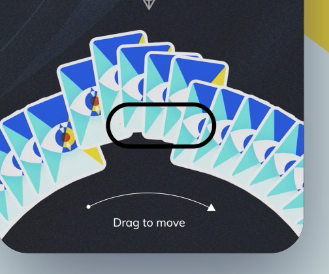
I really see the power in this library but I am short of time to learn how to use it and would really like help in creating this or something similar. https://dribbble.com/shots/7696045-Tarot-App-Design The card rotation animation in particular is what I am trying to achieve. But I would like to talked through it as well so I can improve my skills with GSAP. Please let me know if you can help and the kind of hourly rate you would be looking for. I've got this far with it so far... https://codepen.io/Bwizard/pen/LYRqYOP?editors=1111 Thanks
 1 point
 -
The best thing to do when working with ScrollTrigger is to remove it! This seems counter intuitive, but ScrollTrigger is just animating something on scroll, so just focus on the animation at first and only when you're happy with the animation add ScrollTrigger back in. This way you can focus on one part at a time and it will save a lot of headache when debugging. Also check out other common ScrollTrigger mistakes https://gsap.com/resources/st-mistakes/ If you remove ScrollTrigger in your demo you'll see that your animation is perfect, so we don't have to debug the animation it self and we can just focus on ScrollTrigger. You already have markers on so that is great! If you pay attention to the markers you can see your end marker at the bottom of the page is already past the marker at the bottom of the element, which means your animation is done, but it hasn't even started yet!? So you have a logic issue here. Your start markers havent even started yet, but your end markers are already done, so as soon as ScrollTriggers starts is sees it needs to finish already, so it sets the progress of your timeline to 100% and thus you'll see a sudden jump. If you reposition your end marker to also be at the top of the page, you'll see everything works as expected. You also had another issue, when working with timelines the tweens on that timeline can't have ScrollTriggers them selfs only the timeline can have a ScrollTrigger I’ve placed some comments in your JS to better explain things, please be sure to read through them! https://codepen.io/mvaneijgen/pen/LYaXEzw?editors=0010 You can set transformOrigin to an element you can make this any point you like https://gsap.com/docs/v3/GSAP/CorePlugins/CSS?_highlight=transformorigin#transformorigin If you have a specific path in mind you can also use the MotionPath plugin https://gsap.com/docs/v3/Plugins/MotionPathPlugin/ with it you can have a element follow a specific path, really powerful tool!1 point
-
Thanks a lot! Thankyou so much for the showing a better example1 point
-
Hello, I am looking for a developer to build or redesign some pages on my website. I am currently using video and it is not working. My website is dvcmarket.com. I want to provide a different image and have you build something like this 3rd party site dvcforless.com. Thank you. Mark1 point
-
I got it figured out, was just over complicating it in my head at first. It's actually pretty simple, just all timing. https://codepen.io/teknolyfe/pen/XWGxzJM1 point
-
The JavaScript animation works now! In the XHTML file, I moved the JS link from the <head> to the last line of the <body>. https://www.edgedpub.com/sample_work_6.php1 point
-
Hi @Jimboc welcome to the forum! I would create a timeline for your setup and then move the one bar to the left and the other to the right using two separate tweens. The fancy calculations you do are great, so be sure to keep them in mind for you next project, but here we can also use xPercent which allows you to move the elements based on there width using a percent value. I’ve placed some comments in your JS to better explain things, please be sure to read through them! The best thing to do when working with ScrollTrigger is to remove it! This seems counter intuitive, but ScrollTrigger is just animating something on scroll, so just focus on the animation at first and only when you're happy with the animation add ScrollTrigger back in. This way you can focus on one part at a time and it will save a lot of headache when debugging. Just removed the comments from the set up to see how it would work on scroll. Hope it helps and happy tweening! https://codepen.io/mvaneijgen/pen/dyrgzxp?editors=10001 point
-
Just revers the tween on the onLeaveBack callback. Hope it helps and happy tweening! https://codepen.io/mvaneijgen/pen/yLwRXZz?editors=00101 point
-
@mvaneijgen Thank you so much for this! So your approach DID work, but for some reason, it made everything so glitchy and slow. however, it did maintain the header/footer of the browser to remain all the time, oh and I cannot PULL TO REFRESH using this approach , maybe I'm doing something wrong? So I tried " ScrollTrigger.config({ ignoreMobileResize: true}) " which I got from the document you provided, and it worked even better. Normalize Scroll Approach: https://candid-churros-7c0625.netlify.app/index2.html Ignore Resize approach: https://candid-churros-7c0625.netlify.app/ Thank you for pointing me in the right direction much appreciated.1 point
-
Couldn't help my self 🤣 In theory you don't need the Motion path plugin, if you just want to rotate the element 360 degrees, but with it you can use any shape you'll like. My first attempt was really different, but then I'd asked ChatGPT "In Javascript how can I convert the mouse movement x and y to a rotation value between 0 to 360 degrees" and there is a Javascript function that calculates the angle from an origin point based on the x and y coordinates, who knew 🤷 https://developer.mozilla.org/en-US/docs/Web/JavaScript/Reference/Global_Objects/Math/atan2 Then it is just setting the correct start an end property and you're done! Nogmaals veel geluk en is dit iets voor op je eigen site!? https://codepen.io/mvaneijgen/pen/QWoZNaR?editors=10111 point
-
Instead of setting pin: true, you can also set pin to an element, if we set it to the element that encloses everything you want to pin eg the .container it works as you want. My advise check the docs and just read it once, sounds boring... but you'll be surprised how much it explains that you didn't even know was possible https://gsap.com/docs/v3/Plugins/ScrollTrigger/. Hope it helps and happy tweening! https://codepen.io/mvaneijgen/pen/mdozPrp1 point
-
Hi @teknolyfe welcome to the forum! I would have a tween that runs initially, that then called another tween when it is done and repeats infinitely. In your initial demo nothing was visible, so I used my own shape to get things up and running. The timing could be better for the initial load, but that is easy to tweak. Hope it helps and happy tweening! https://codepen.io/mvaneijgen/pen/OJqBPVb?editors=00101 point
-
When a tween renders for the first time, it records internally the start/end values so that it can very quickly interpolate. If you want to flush those, you can invalidate() the timeline so that next time it renders, it re-reads them fresh. https://codepen.io/GreenSock/pen/qBvMejB?editors=1010 Is that what you're looking for?1 point
-
Hi @Giustotech and welcome to the GSAP Forums! I'm far from being an expert in CSS filters, normally I stay away from filters because they're expensive and I'm a performance freak 😵💫 But this seems to work the way you expect: https://codepen.io/GreenSock/pen/eYXLqNL Hopefully this helps. Happy Tweening!1 point
-
Yeah probably something has changed 9 years later, no worries. It is always a good idea to log the things you get to make sure they are what you think they are. In this case you can do two things. You want to tween a timeline, so all the logic should move to the timeline. Pausing a tween and then controlling the timeline is what is tripping you up here. // With a timeline let progressBarTl = gsap.timeline({ paused: true, // Timeline gets paused }) progressBarTl.from(".progress-bar", { scaleX: 0, duration: 2, ease: "none" }); // Using a single tween const progressBarTl = gsap.from(".progress-bar", { paused: true, // Tween gets paused scaleX: 0, duration: 2, ease: "none" }); https://codepen.io/mvaneijgen/pen/QWoVZEP?editors=0010 Hope it helps and happy tweening!1 point
-
Hi, @PointC has a great tutorial on animating the ViewBox as well: https://www.motiontricks.com/basic-svg-viewbox-animation/ Happy Tweening!1 point
-
Looks like Mitchel was right 👍- for that you really wouldn't need an onReverse callback. Here's just two ways you could handle something like that - and there's probably a couple others beyond those. I hope these will be helpful already, though: Depending on the index of the dot (to make sure neither the first nor the last will get toggled at the end in any direction), you could .add() functions before and after each of your tweens to toggle the class . https://gsap.com/docs/v3/GSAP/Timeline/add()/ https://codepen.io/akapowl/pen/yLwxXgX Or (even better) with similar logic with regard to the index, have things handle via GSAP altogether with .set() calls; unless you really need that active class, like maybe for something else outside of the pure styling. https://gsap.com/docs/v3/GSAP/Timeline/set() https://codepen.io/akapowl/pen/yLwxXMX Some hints with regard to syntax: // Instead of this: tl.to(dot, { rotate: "180deg" }) // You could just do this: tl.to(dot, { rotation: 180 }) https://gsap.com/docs/v3/GSAP/CorePlugins/CSS Also there is no such ease as 'linear' - if you want linear interpolation, ease: 'none' is what your looking for. If I am not mistaken, any invalid ease like that would fall back to the default ease of 'power1.out'. Edit: It looks like 'linear' seems to be accepted though, and will result in no easing 🤔 And apparently that is the case since like forever in GSAP3 ...didn't even know that 😅 https://gsap.com/docs/v3/Eases/1 point
-
While I definitely agree that a lot of times that might be true - probably even most of the time - I certainly wouldn't agree with 100%. There definitely are usecases where an onReverse can be handy in cases outside of events. That's why there also is a work-flow example in the helper-functions section of the docs that explains how to create your own custom onReverse() callback functionality, @MarcoCuel. https://gsap.com/docs/v3/HelperFunctions/ https://gsap.com/docs/v3/HelperFunctions/helpers/trackDirection/ It comes with caveats though - e.g. logically it will take one tick to update the direction as is explained in the orange 'caution' box over there - thus you might have to accomodate your own logic to that fact if you want to trigger things onReverse appropriately then. Some of the reasons that it is not included in GSAP's core are, that having it external like that keeps the core lightweight and doesn't require extra processing on the vast majority of animations that don't need this functionality. That last part comes directly from Jack (@GreenSock). If you have more questions, I'm sure he'll be able to answer them.1 point
-
You don't see anything because there is no stroke visible to animate. DrawSVG animates the stroke of and element. Here is your pen with the stroke visible and thus you can see what DrawSVG is doing. What you're probably are looking for to draw the paths in the font you've outline here, that is not possible by default, but our own @PointC got you covert and has written a tutorial that walks you through the process of creating this, see https://www.motiontricks.com/svg-calligraphy-handwriting-animation/ Hope it helps and happy tweening! https://codepen.io/mvaneijgen/pen/oNVPLOv1 point
-
Sorry, I'm not sure I can edit it so that you easily understand it. That's why I spend hours creating video lessons that explain everything in detail. However, this is what the edited code would look like: https://codepen.io/snorkltv/pen/wvOyeYO?editors=0010 Good luck with the rest of your project1 point
-
This seems just like a recent lesson from my SVG Animation with GSAP course. The general idea is that each item has it's own repeating animation created in a loop https://codepen.io/snorkltv/pen/zYyBKmG1 point
-
Hey meervdnick and welcome to the GreenSock forums! This sort of effect is quite simple to make. Simply have a list of words inside of a container and make sure that container has overflow:hidden; Then animate the words in and out of that container. Here's a demo from another recent thread that does this basic behavior: https://codepen.io/marklc44/pen/RKPdEV To stagger the letters, I recommend using GSAP's SplitText as you commented. Modifying the above demo to also use GSAP 3 and SplitText you could do something like this: https://codepen.io/GreenSock/pen/VwYKXzO?editors=00101 point
-
A little tip about masking a stroke like PointC is doing. If you notice your masks are being clipped or aren't showing up, try specifying the units like this. <mask id="mask" maskUnits="userSpaceOnUse"> <path class="mask-path" d="M100,250 500,250" /> </mask> In this demo you can't see the vertical and horizontal lines. And in some browsers like Firefox and IE/Edge, the curved path is being clipped 20px on the top and bottom. http://codepen.io/osublake/pen/394dfe1ade2c3a51d1f3516ecda2b794?editors=1000 And here it is after setting the units. http://codepen.io/osublake/pen/d9b5c4c5204a8bf3e4044c30c813a2c8?editors=10001 point


.thumb.jpg.45ad1f0654d8c8cd759c47599fe1796d.jpg)